


Set up QuickPass before you sign.
QuickPass verifies who you are and approves each signature from your phone. Registration has two parts: verify your identity, then register your device.
Before you start, have these ready
- An Android or iPhone with a working camera and internet connection
- Your 11-digit mobile number, to receive a one-time code (OTP)
- An email address you can open on the same day
- Your national identity (NID) card, either the original or a clear photocopy
- A well-lit place to take a selfie
Install QuickPass
Download QuickPass from Google Play or the App Store. Use only the official listings below.
About QuickPass on the official website ↗

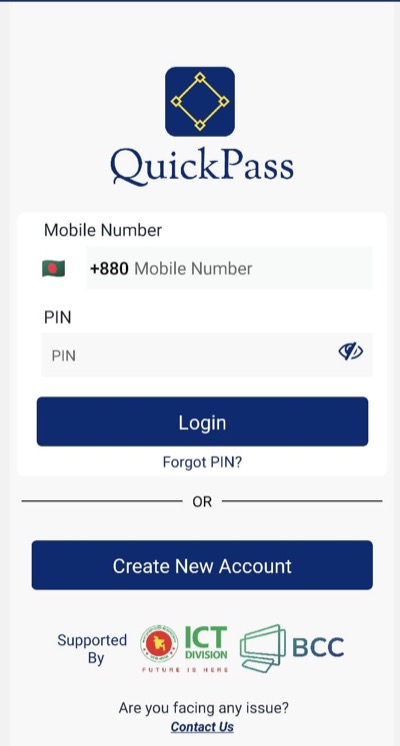
Tap “Create New Account”
Open QuickPass. Below the login form, tap Create New Account.
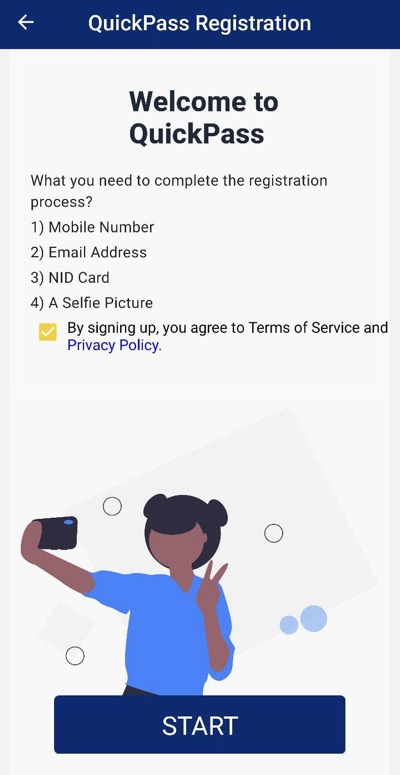
Accept the privacy policy and tap Start
The welcome screen lists what you need: your mobile number, email address, NID card, and a selfie. Tick the box to agree to the Terms of Service and Privacy Policy, then tap Start.
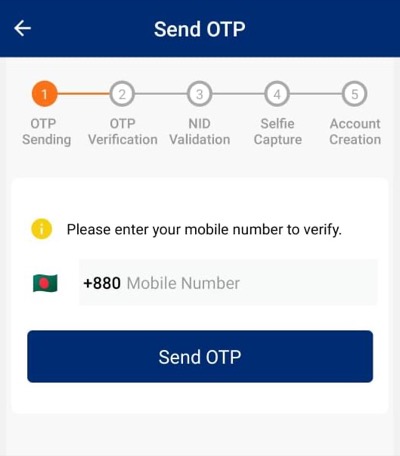
Verify your mobile number
Enter your 11-digit mobile number and tap Send OTP. Type the 6-digit code you receive by SMS and tap Verify OTP. If the code doesn’t arrive, wait for the timer to finish and tap Resend OTP.
Photograph the front of your NID card
Your camera opens automatically. Place the front side of your NID card inside the frame on screen and tap Take picture. Lay the card flat in good light, and avoid glare or shadows over the text and photo.
Take a liveness selfie
Look at the camera and follow each instruction on screen: blink both eyes, turn your head to the right, move your head down, and smile. When the blue circle is complete, tap Take picture.
Check your details and set a PIN
Your selfie is matched against your national ID record. If it matches, your NID details appear on screen. Check them, enter your email address, choose a PIN, confirm it, and tap Submit.
You’ll see “Congratulations. You are successfully registered to BCC Ekyc System” when your identity verification is complete.
Log in and tap Remote Authorisation
Log in to QuickPass with your mobile number and new PIN. On the home screen, tap Remote Authorisation to start registering this phone.
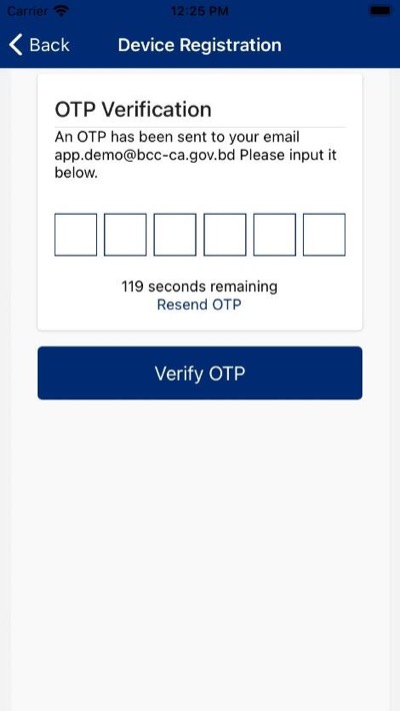
Enter the code sent to your email
QuickPass sends a one-time code to your registered email address. Type it in and tap Verify OTP.
Confirm with your fingerprint or passcode
Scan your fingerprint or enter your phone’s passcode when asked. When you see “Device Registered”, your phone is ready to authorise signatures.
Registered? You’re ready to sign.
See how to upload, sign and verify your first document, or read the official BCC-CA manuals ↗